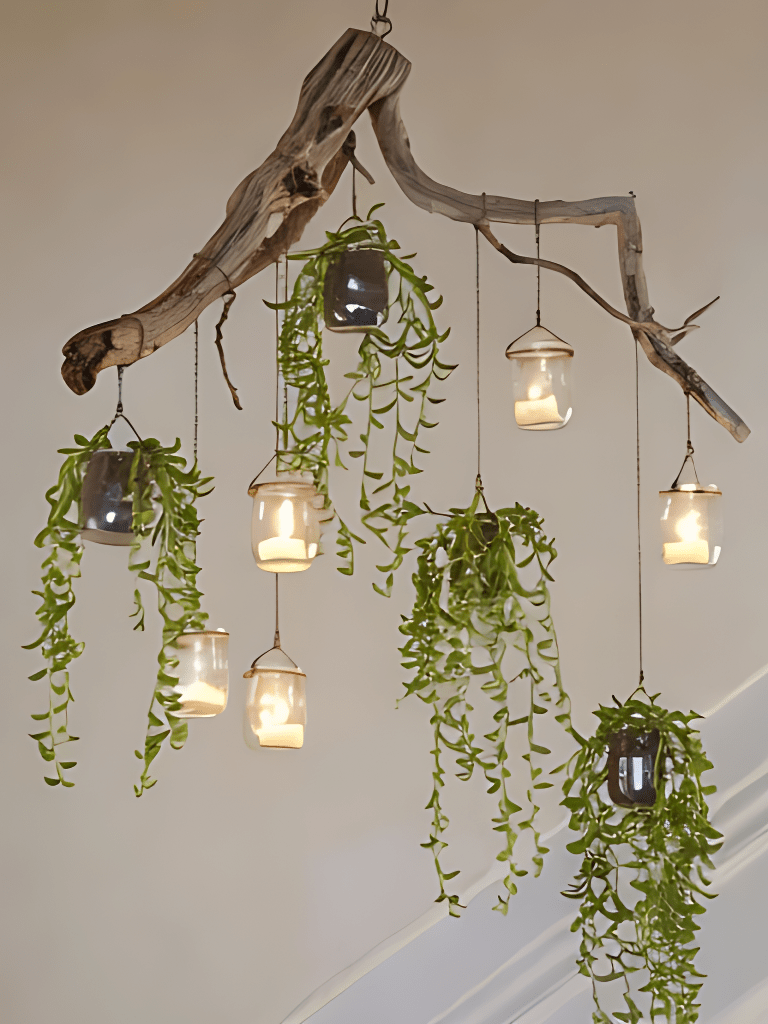
The advantage of indoor plant chandeliers is that they are not only beautiful but also do not take up any extra floor space, making them absolutely the best choice to enhance space and decoration.
Prepare materials:
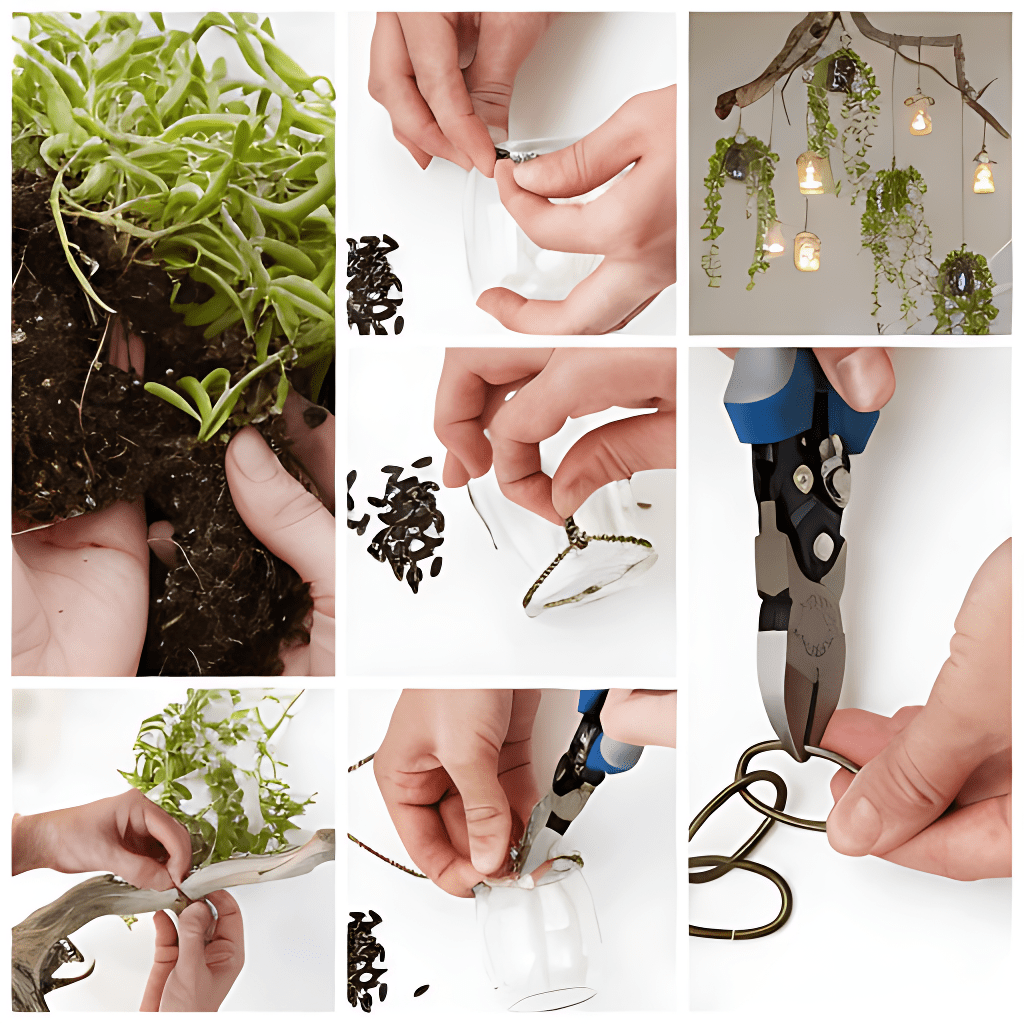
- Thick branches with distinctive shapes
2.Eyebolts - Requires 9 meters of chain
- 8~9 small glass bottles
- Some small hanging plants
- Some small candles or small lights with batteries
7.Drill bit
Drill bit to match eyebolt size - Wire cutters
Pliers (chain pliers, if you have them)
Operation process:
- Pre-drill holes at the top of the branch or where you will place the eyebolts. (It is recommended to hold the branch gently to find a natural balance point and pre-drill holes at that point).
- Screw the eyebolt into the pre-drilled hole.
- Use wire cutters to cut the length of the chandelier fixing chain and hang the chandelier from the ceiling.
- Attach the chain to the eyebolts and use pliers to close the gaps in the chain links.
- Measure the chain and bottle neck, cut it to the same length as the bottle neck and fix it on the bottle neck.
- Then cut the chain to a length that can connect the bottle and the branch (the length is based on personal preference)
- Then cut out a chain with the same thickness as the branch to connect the corresponding bottle.
- Put hanging plants and small candles or small electric lights into bottles or wrap them around chains
- Wrap the previously cut chains as thick as the branches around the branches, and then connect all the small bottles to the chains at different locations. Check for even weight distribution during this process.
A beautiful plant chandelier is completed.